One of the less well-known benefits of working at Automattic, the company behind WordPress.com, is that they will contribute $2,000 towards improving your home office.
My back, neck, and wrists have been slowly worsening over the last few years so when I found out from my mentor, Daryl Houston, that Automattic would contribute money towards a new setup, I jumped at the opportunity. I emailed Lori McLeese, our ever-helpful HR lead, and she introduced me to Automattic’s ergonomic consultant, Jeff Meltzer.
Jeff founded and is the president of Applied Ergonomics, an Illinois-based furniture dealership that works with Automattic employees to solve just the type of issues that I was having. Every Automattic employee he works with receives a custom setup based on their specific requirements. Jeff recently wrote about his experience working with Automattic employees in a post titled Making Happiness Engineers Happier & Healthier One Ergonomic Consultation at a Time.
Jeff and I set up a time to video chat over Skype and wound up talking for almost two hours (Automattic pays for the consultation and the cost is separate from the $2,000 contribution). For the majority of the conversation we discussed my current home office and the issues I was experiencing. I appreciated that he was not just trying to sell me something based on some preconceived idea of what my issues were. He was really trying to understand my situation: How much time did I normally spend at a computer each day? Had I ever tried a standing desk? What was my normal posture? Where was I having pain? We positioned and repositioned my laptop so that he could see my current setup. I took measurements and he took lots of notes.
It was not until the last half hour of the conversation that he started to propose possible solutions. We looked at several different desks, chairs, keyboards, and mice. In the end I wound up purchasing an adjustable desk, a new chair, and a monitor arm.
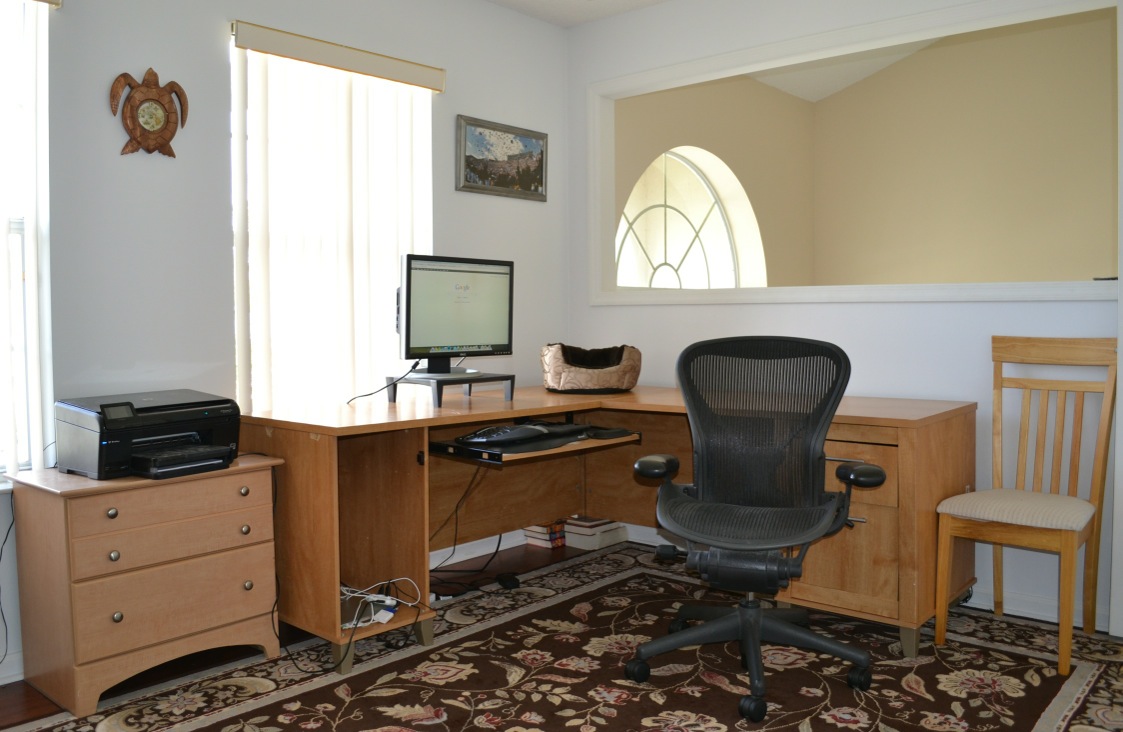
Home Office: Before
Before the new furniture arrived, this is what my home office looked like:

The four year old L-shaped Office Max desk had been through three moves across three states and was not doing so well. The back corner was propped up by books and the surface was warped from setting too many drinks on it.
The chair is an Herman Miller Aeron chair that I purchased off of Craigslist back in 2010 when I first started experiencing back issues.
The 24″ Dell monitor is propped up by a small monitor stand. The monitor is connected to a Macbook Pro which sits on the bottom left shelf.
The keyboard is a Microsoft Ergonomic Keyboard 4000 that I’ve been using for many years.
The kitchen chair on the right allowed my rat terrier to get onto the desk to hang out in her little dog bed.
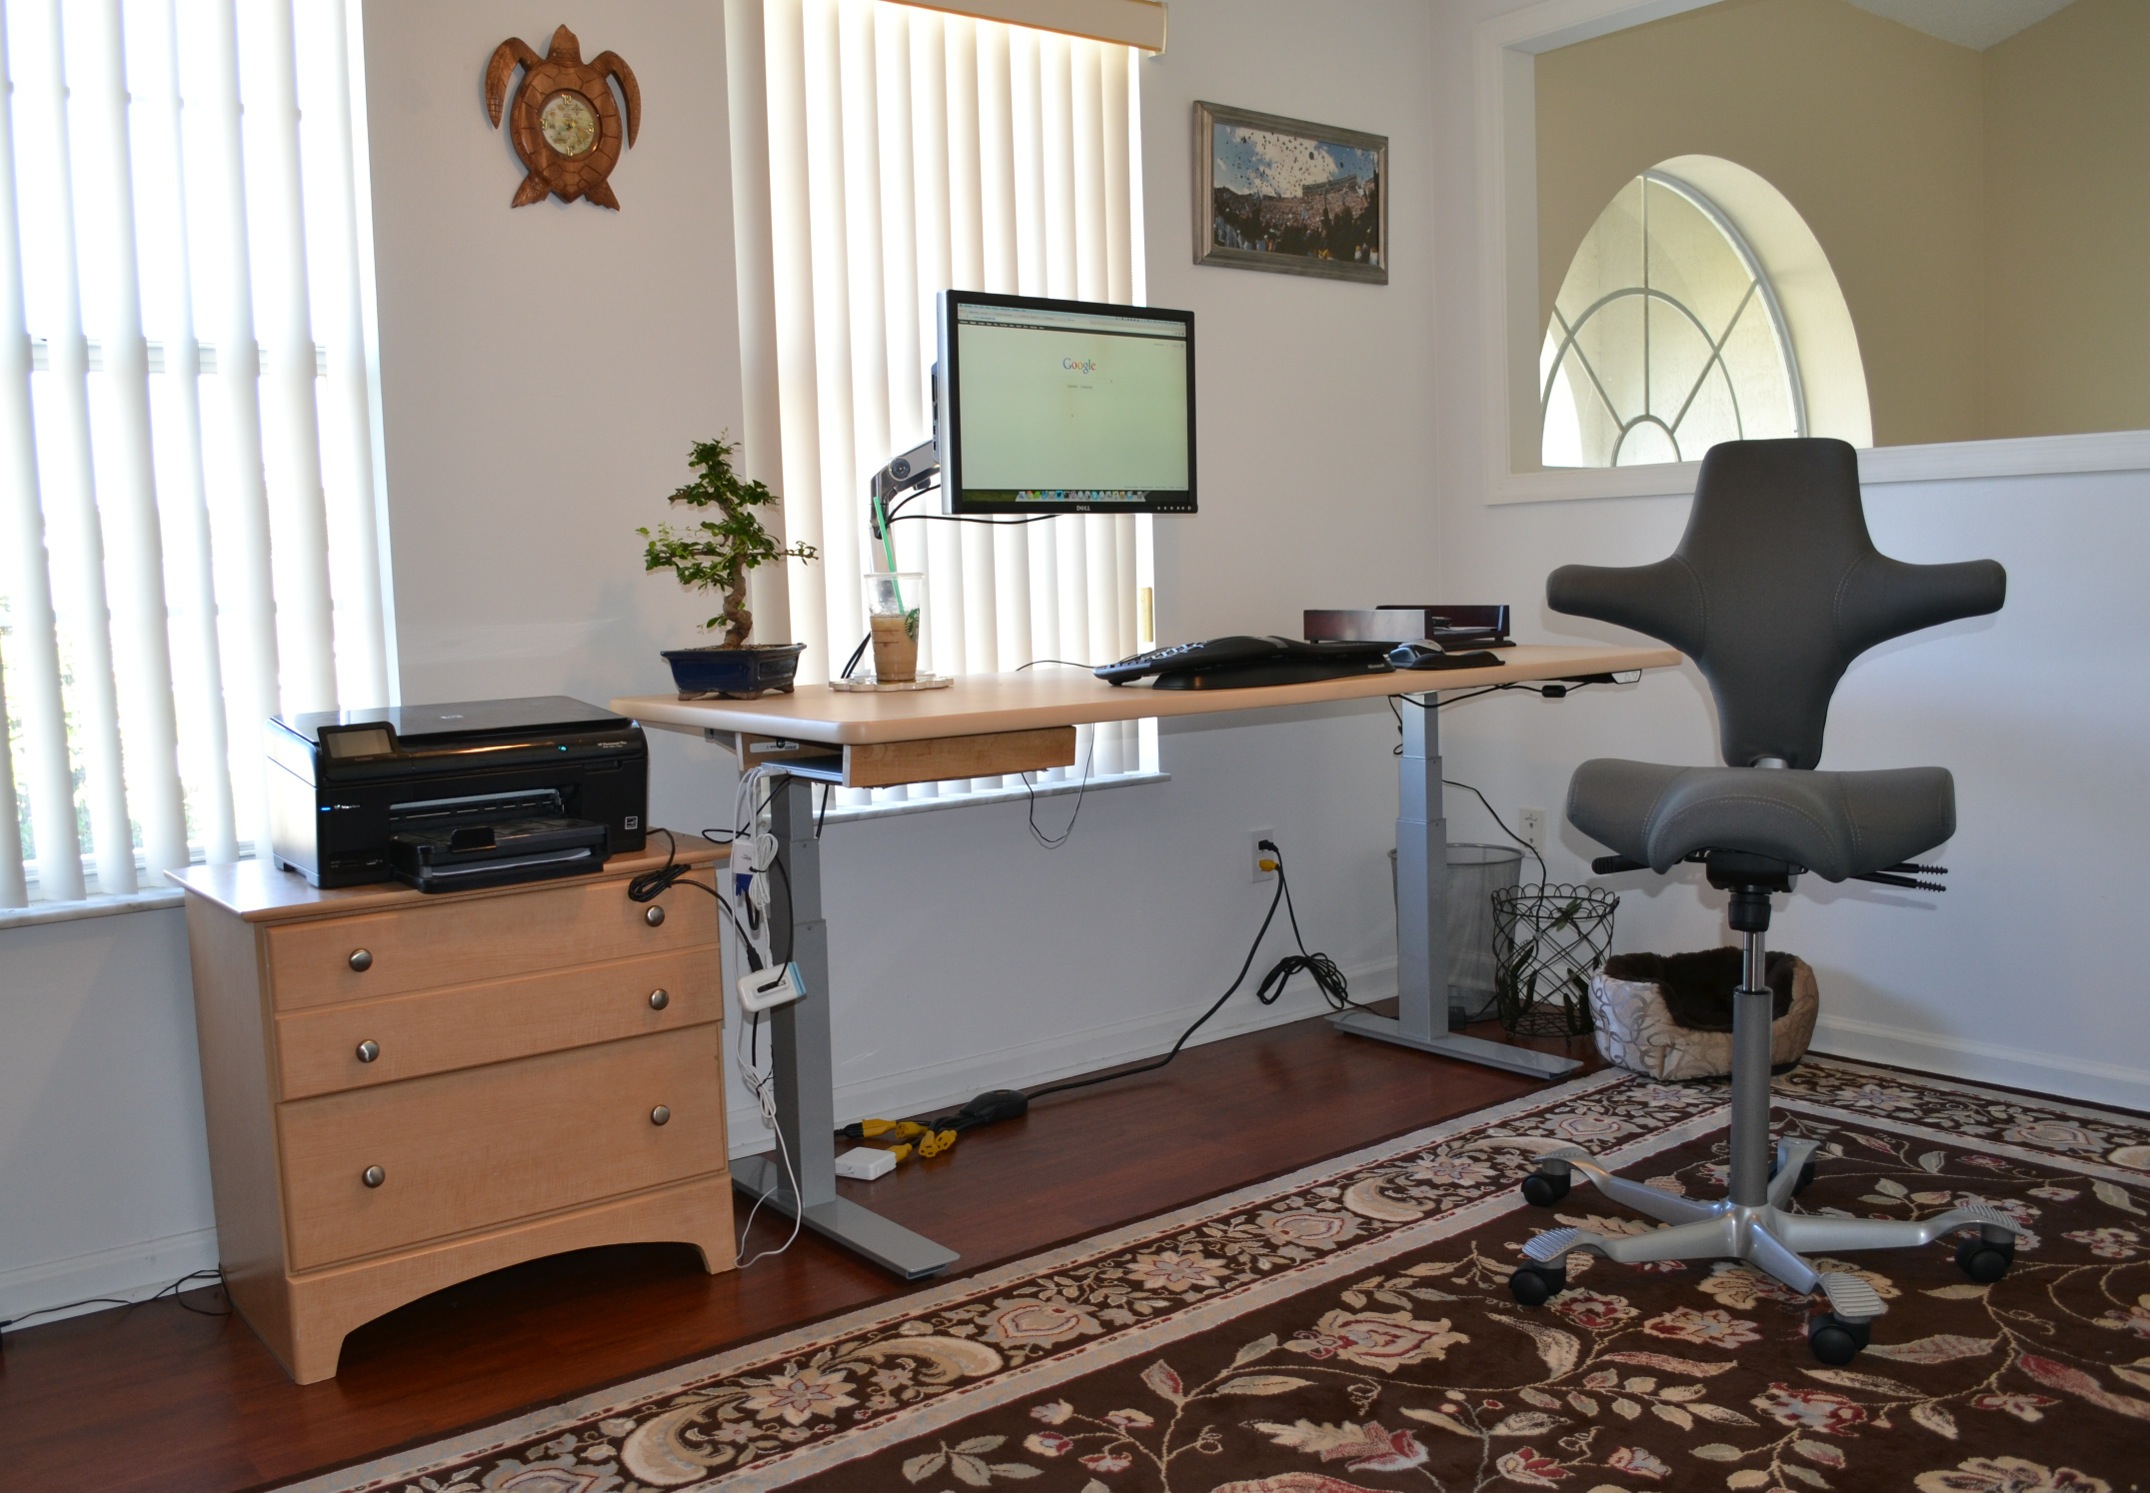
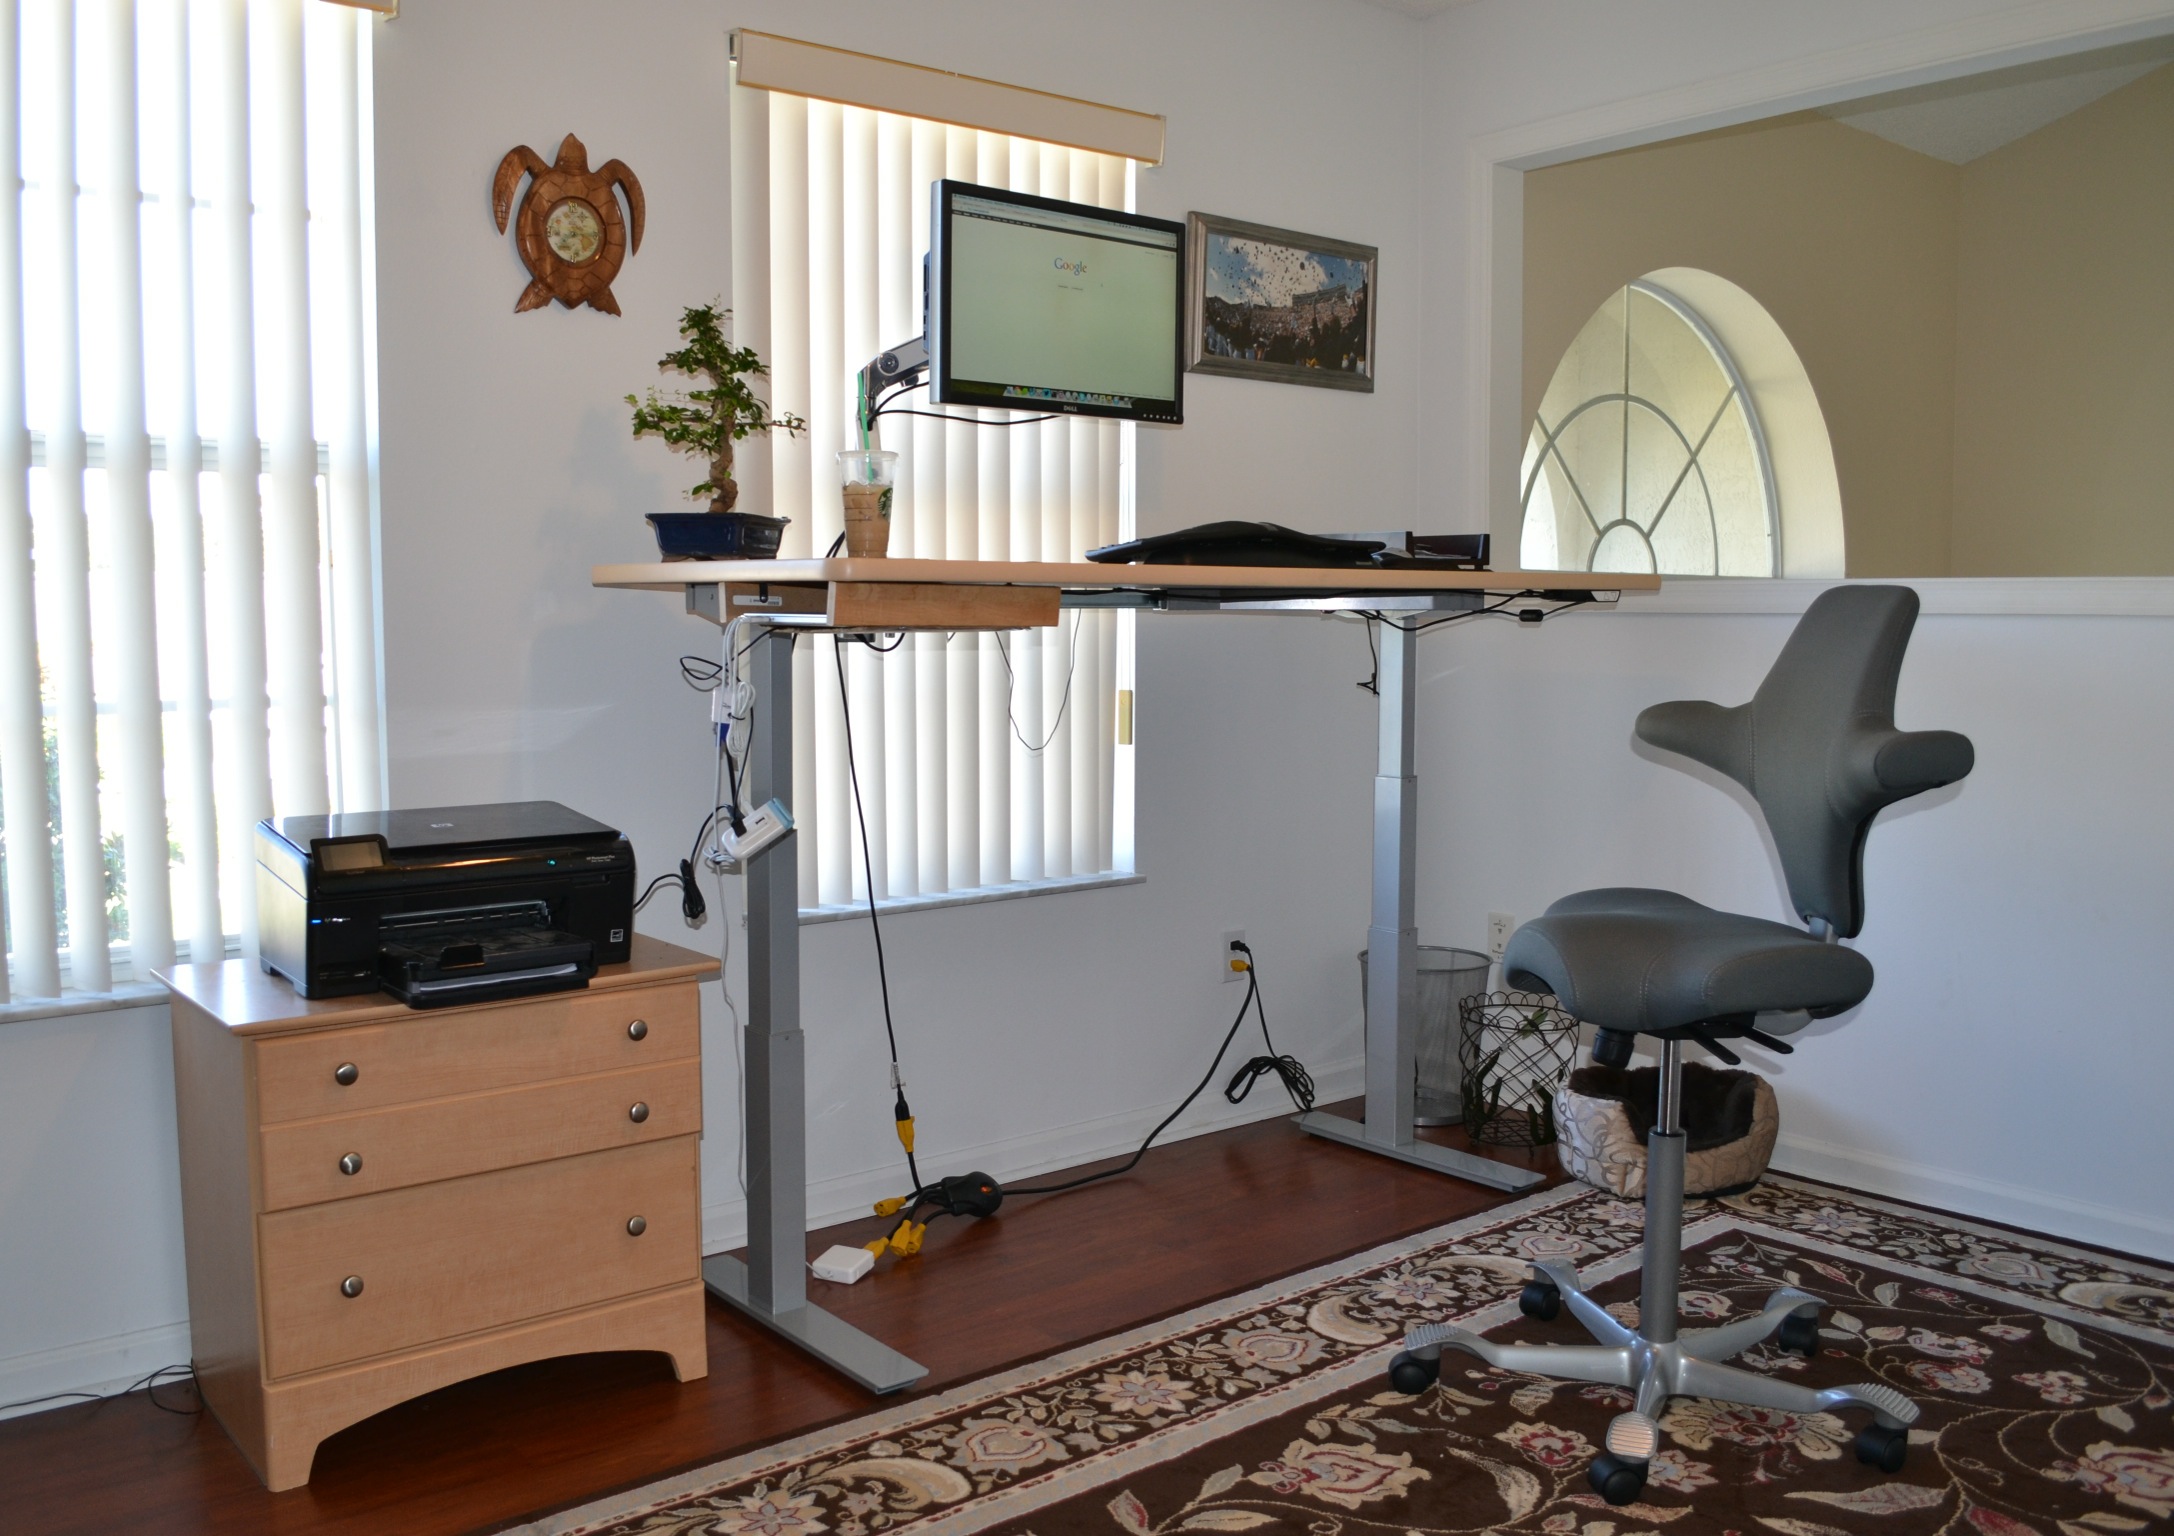
Home Office: After
I present to you my new home office:


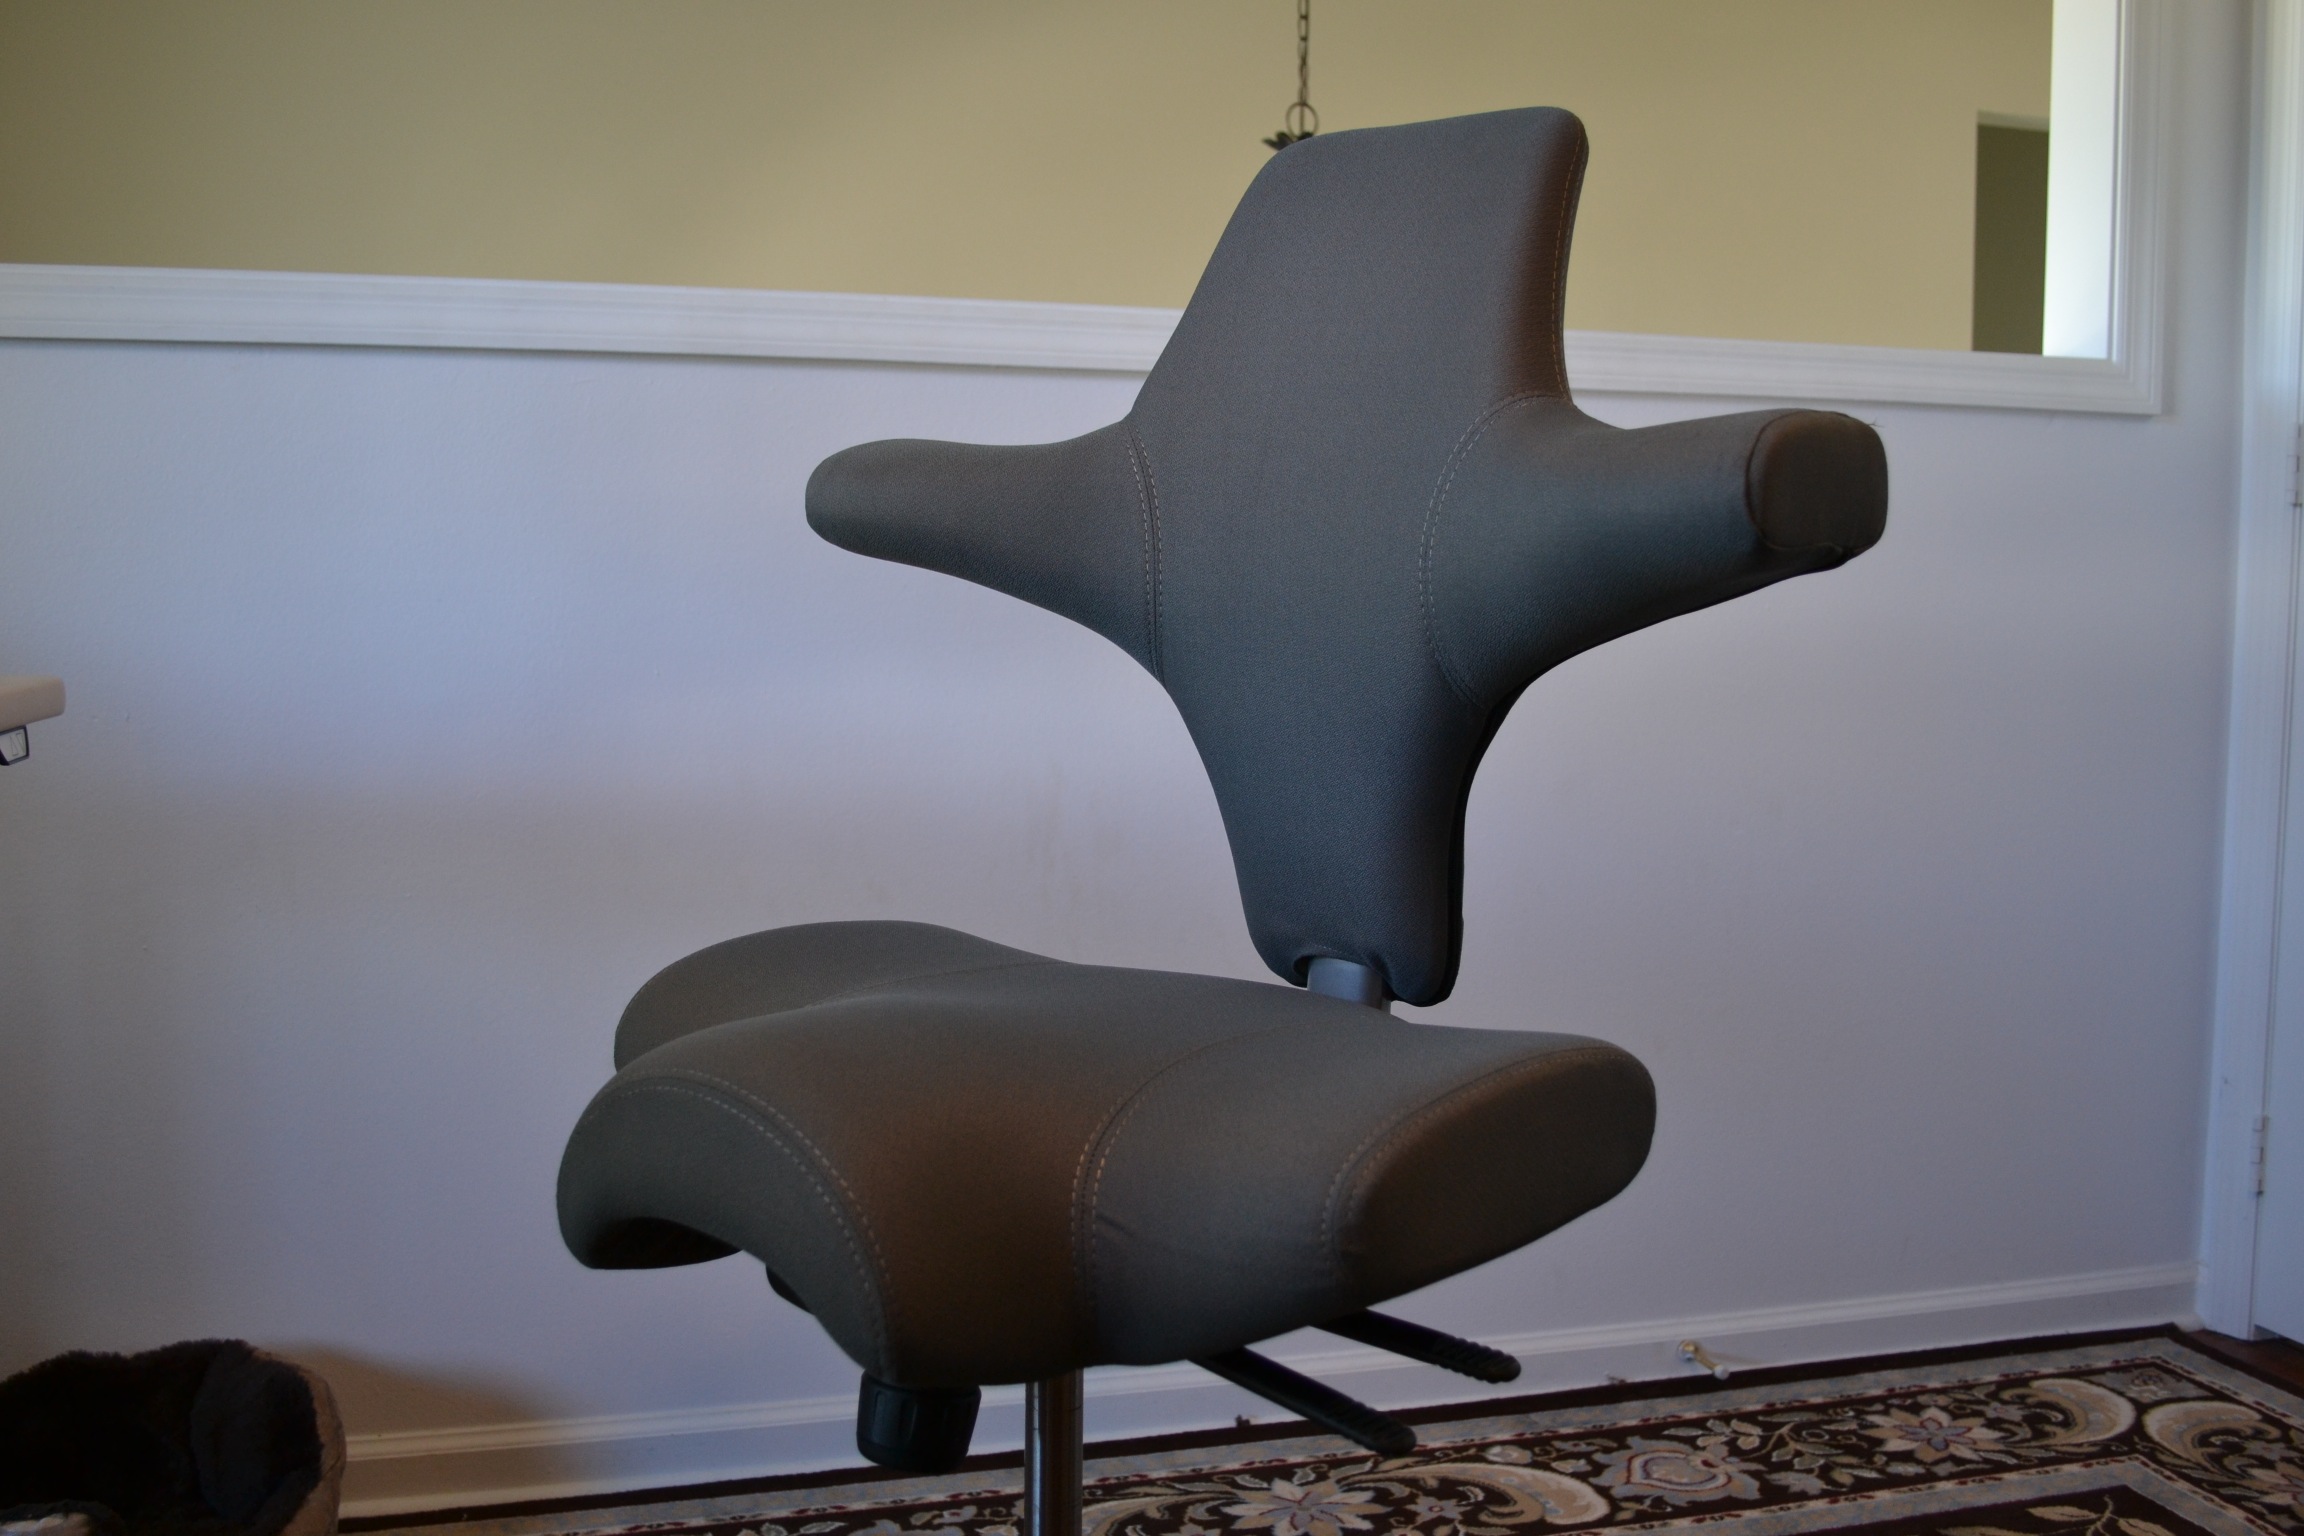
The Chair
The chair is a HÅG Capisco 8106 [1]:

There are a few things I really like about this chair:
First, it doesn’t have arms. It has these two little nubs that protrude from the back where you can rest your elbows. Because they’re so far back, it forces you to keep your elbows back which encourages good posture.
Also, the front right and left of the seat are carved out which I have found to be a lot more comfortable than one that is even on the front.
Finally, the seat’s height and depth as well as the back height can all be adjusted which makes it easy to find a position that suits you.
The Desk
The desk is a RISE Electric Height Adjustable Desk [2] which means that it can be adjusted so that I can either sit or stand while working. Here is what it looks like in the standing position:

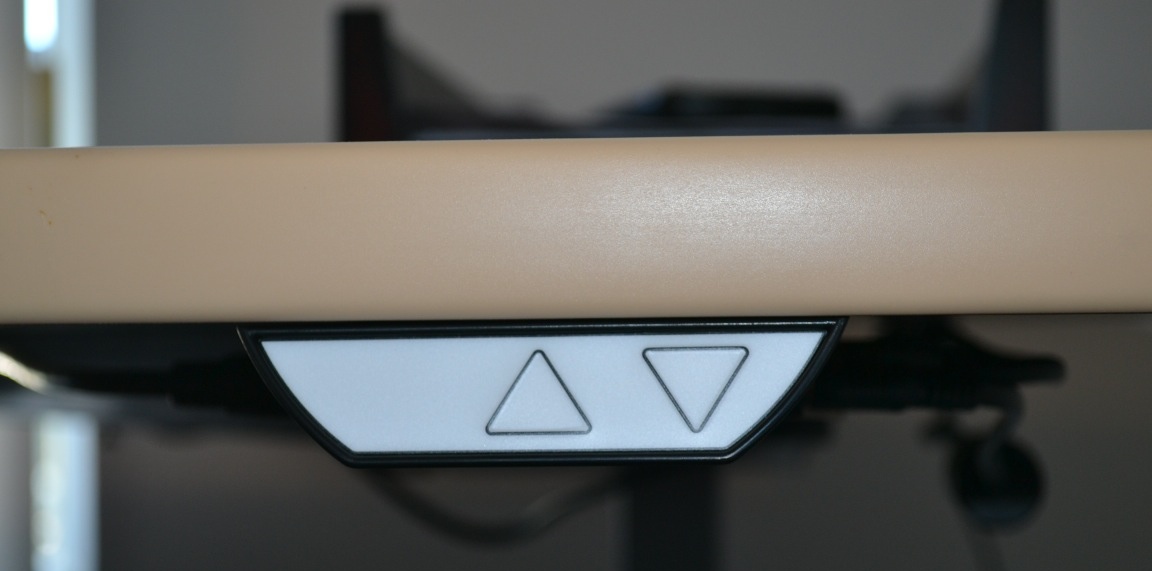
The desk has a small remote under the bottom right ledge which allows you to electronically adjust it up and down:

One of the nice things about the RISE desk is that it has a very sparse under-surface structure which makes it easy to install a keyboard tray (something I might get in the future) or a small shelf. I did wind up building a small one underneath the bottom left side (which you can see in the picture above) to hold my laptop because I don’t use it as a second monitor and therefore I don’t need to have it out on the desk all day.
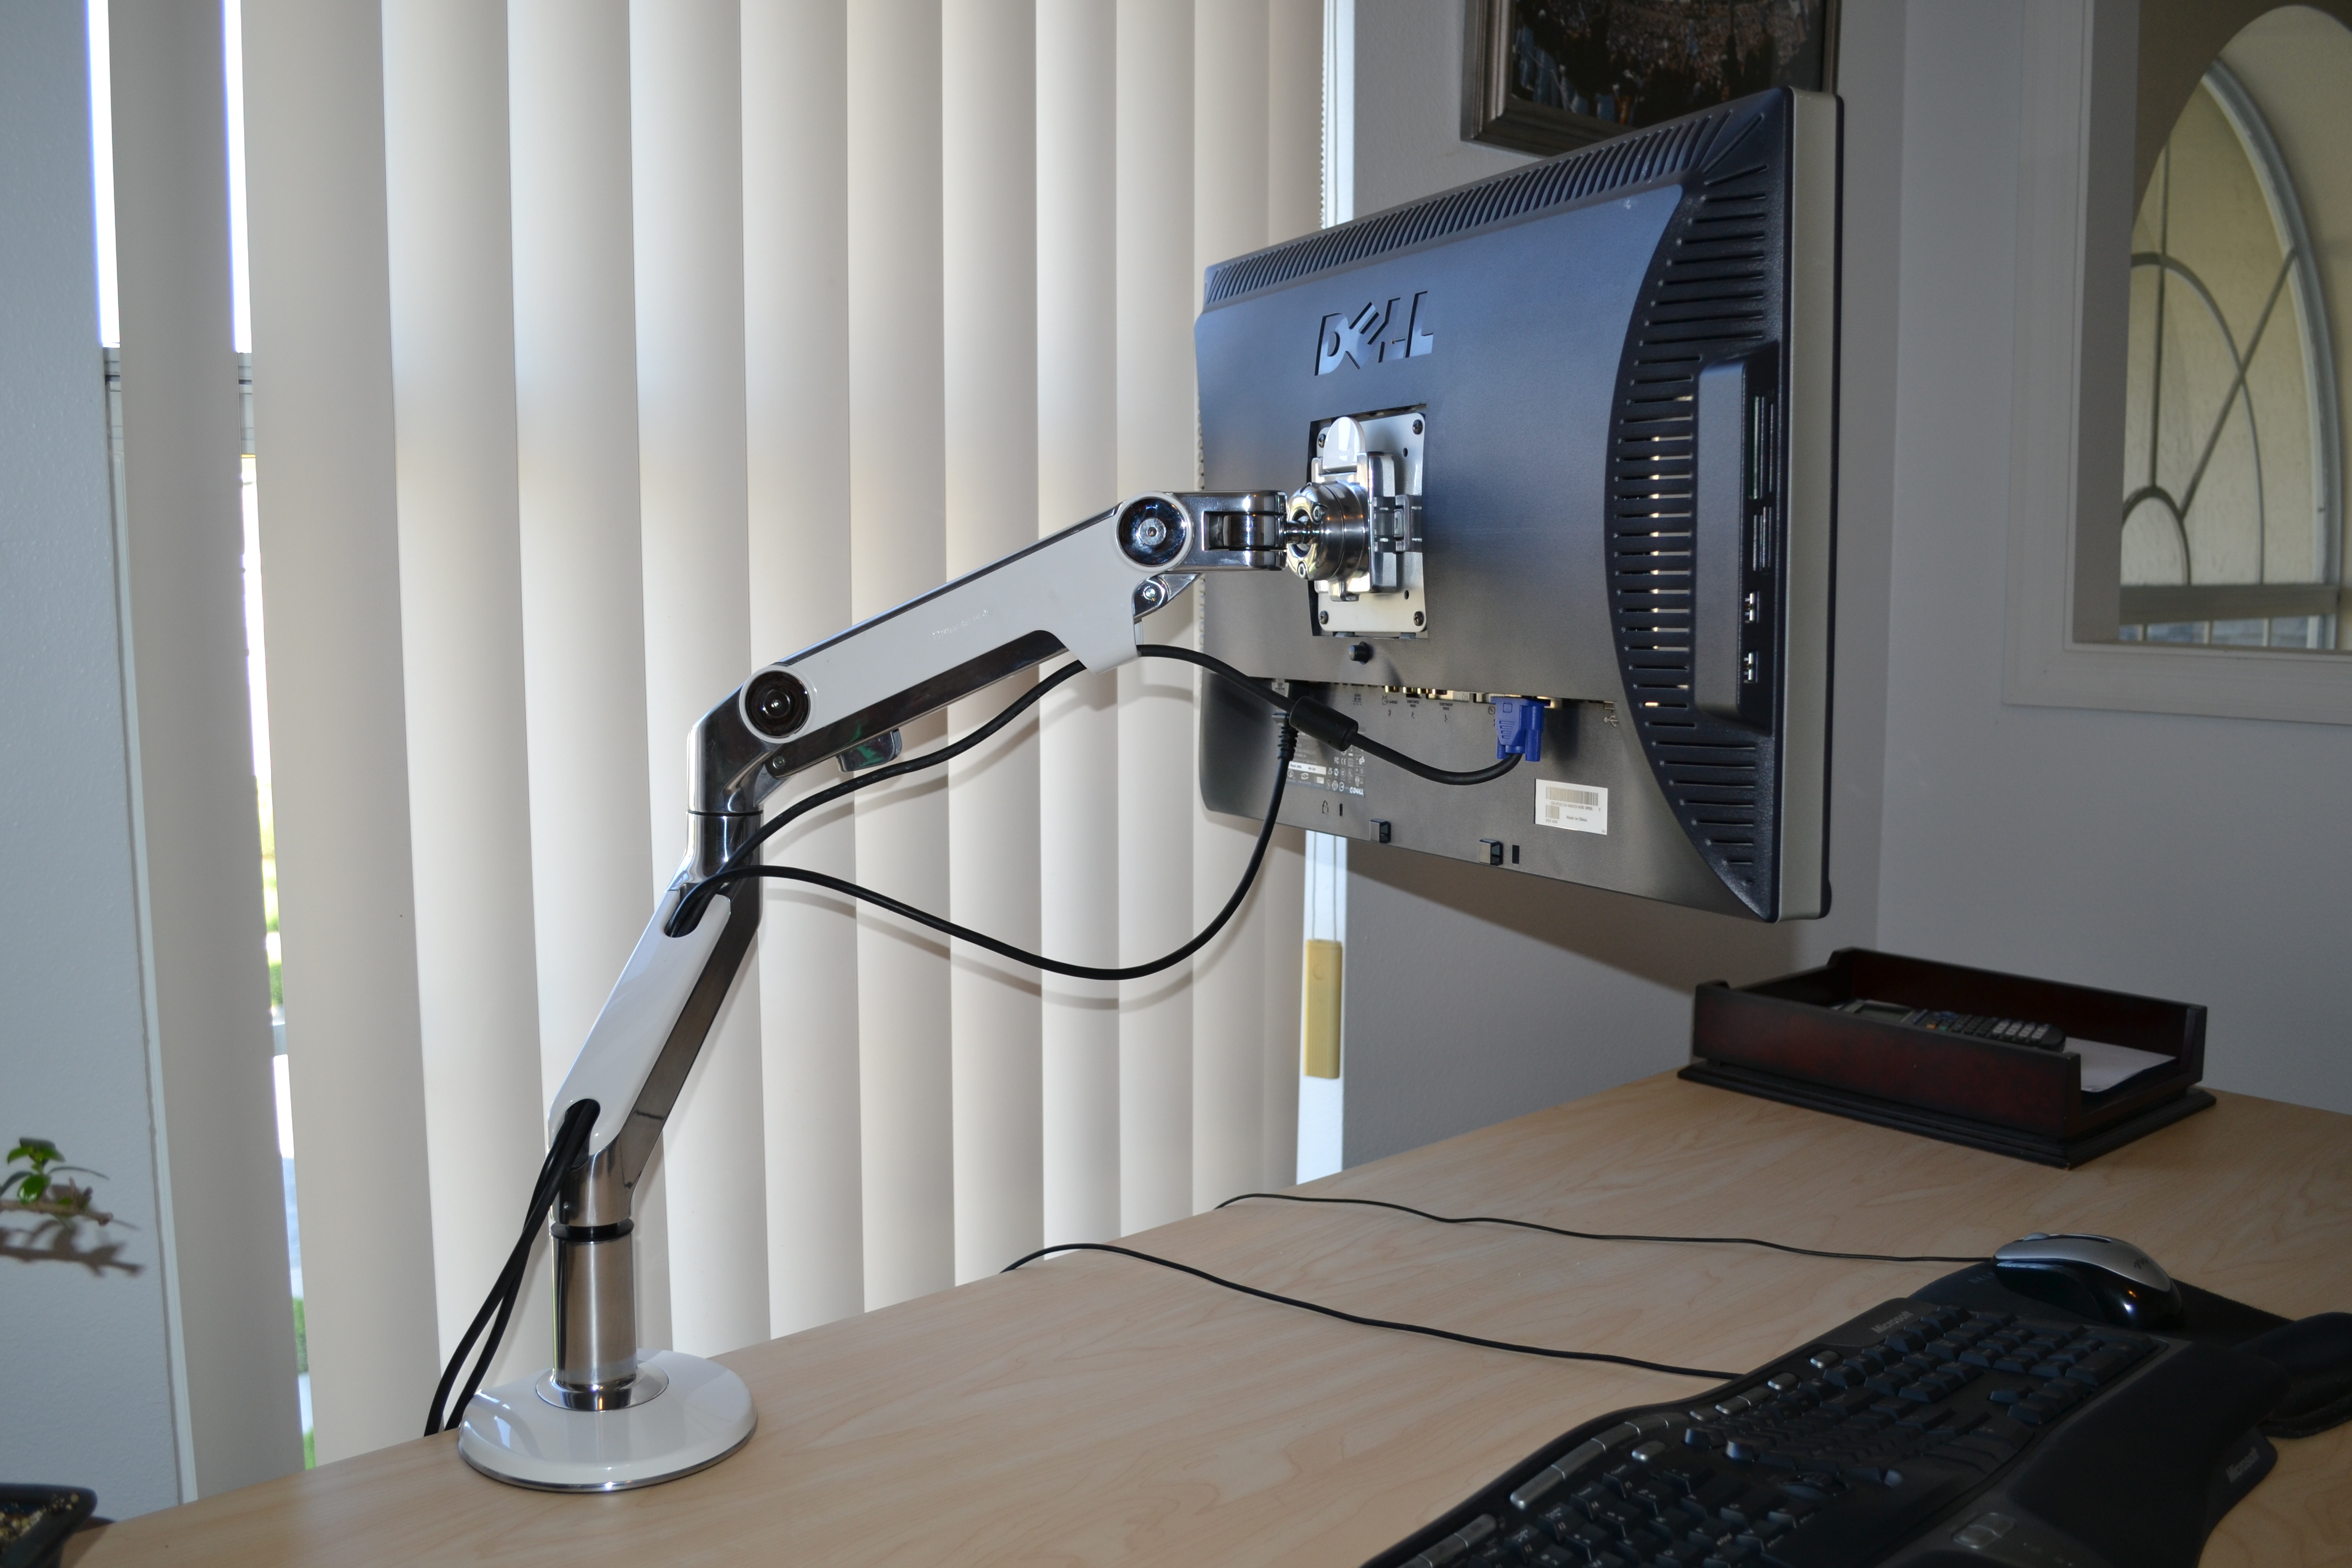
The Monitor Arm
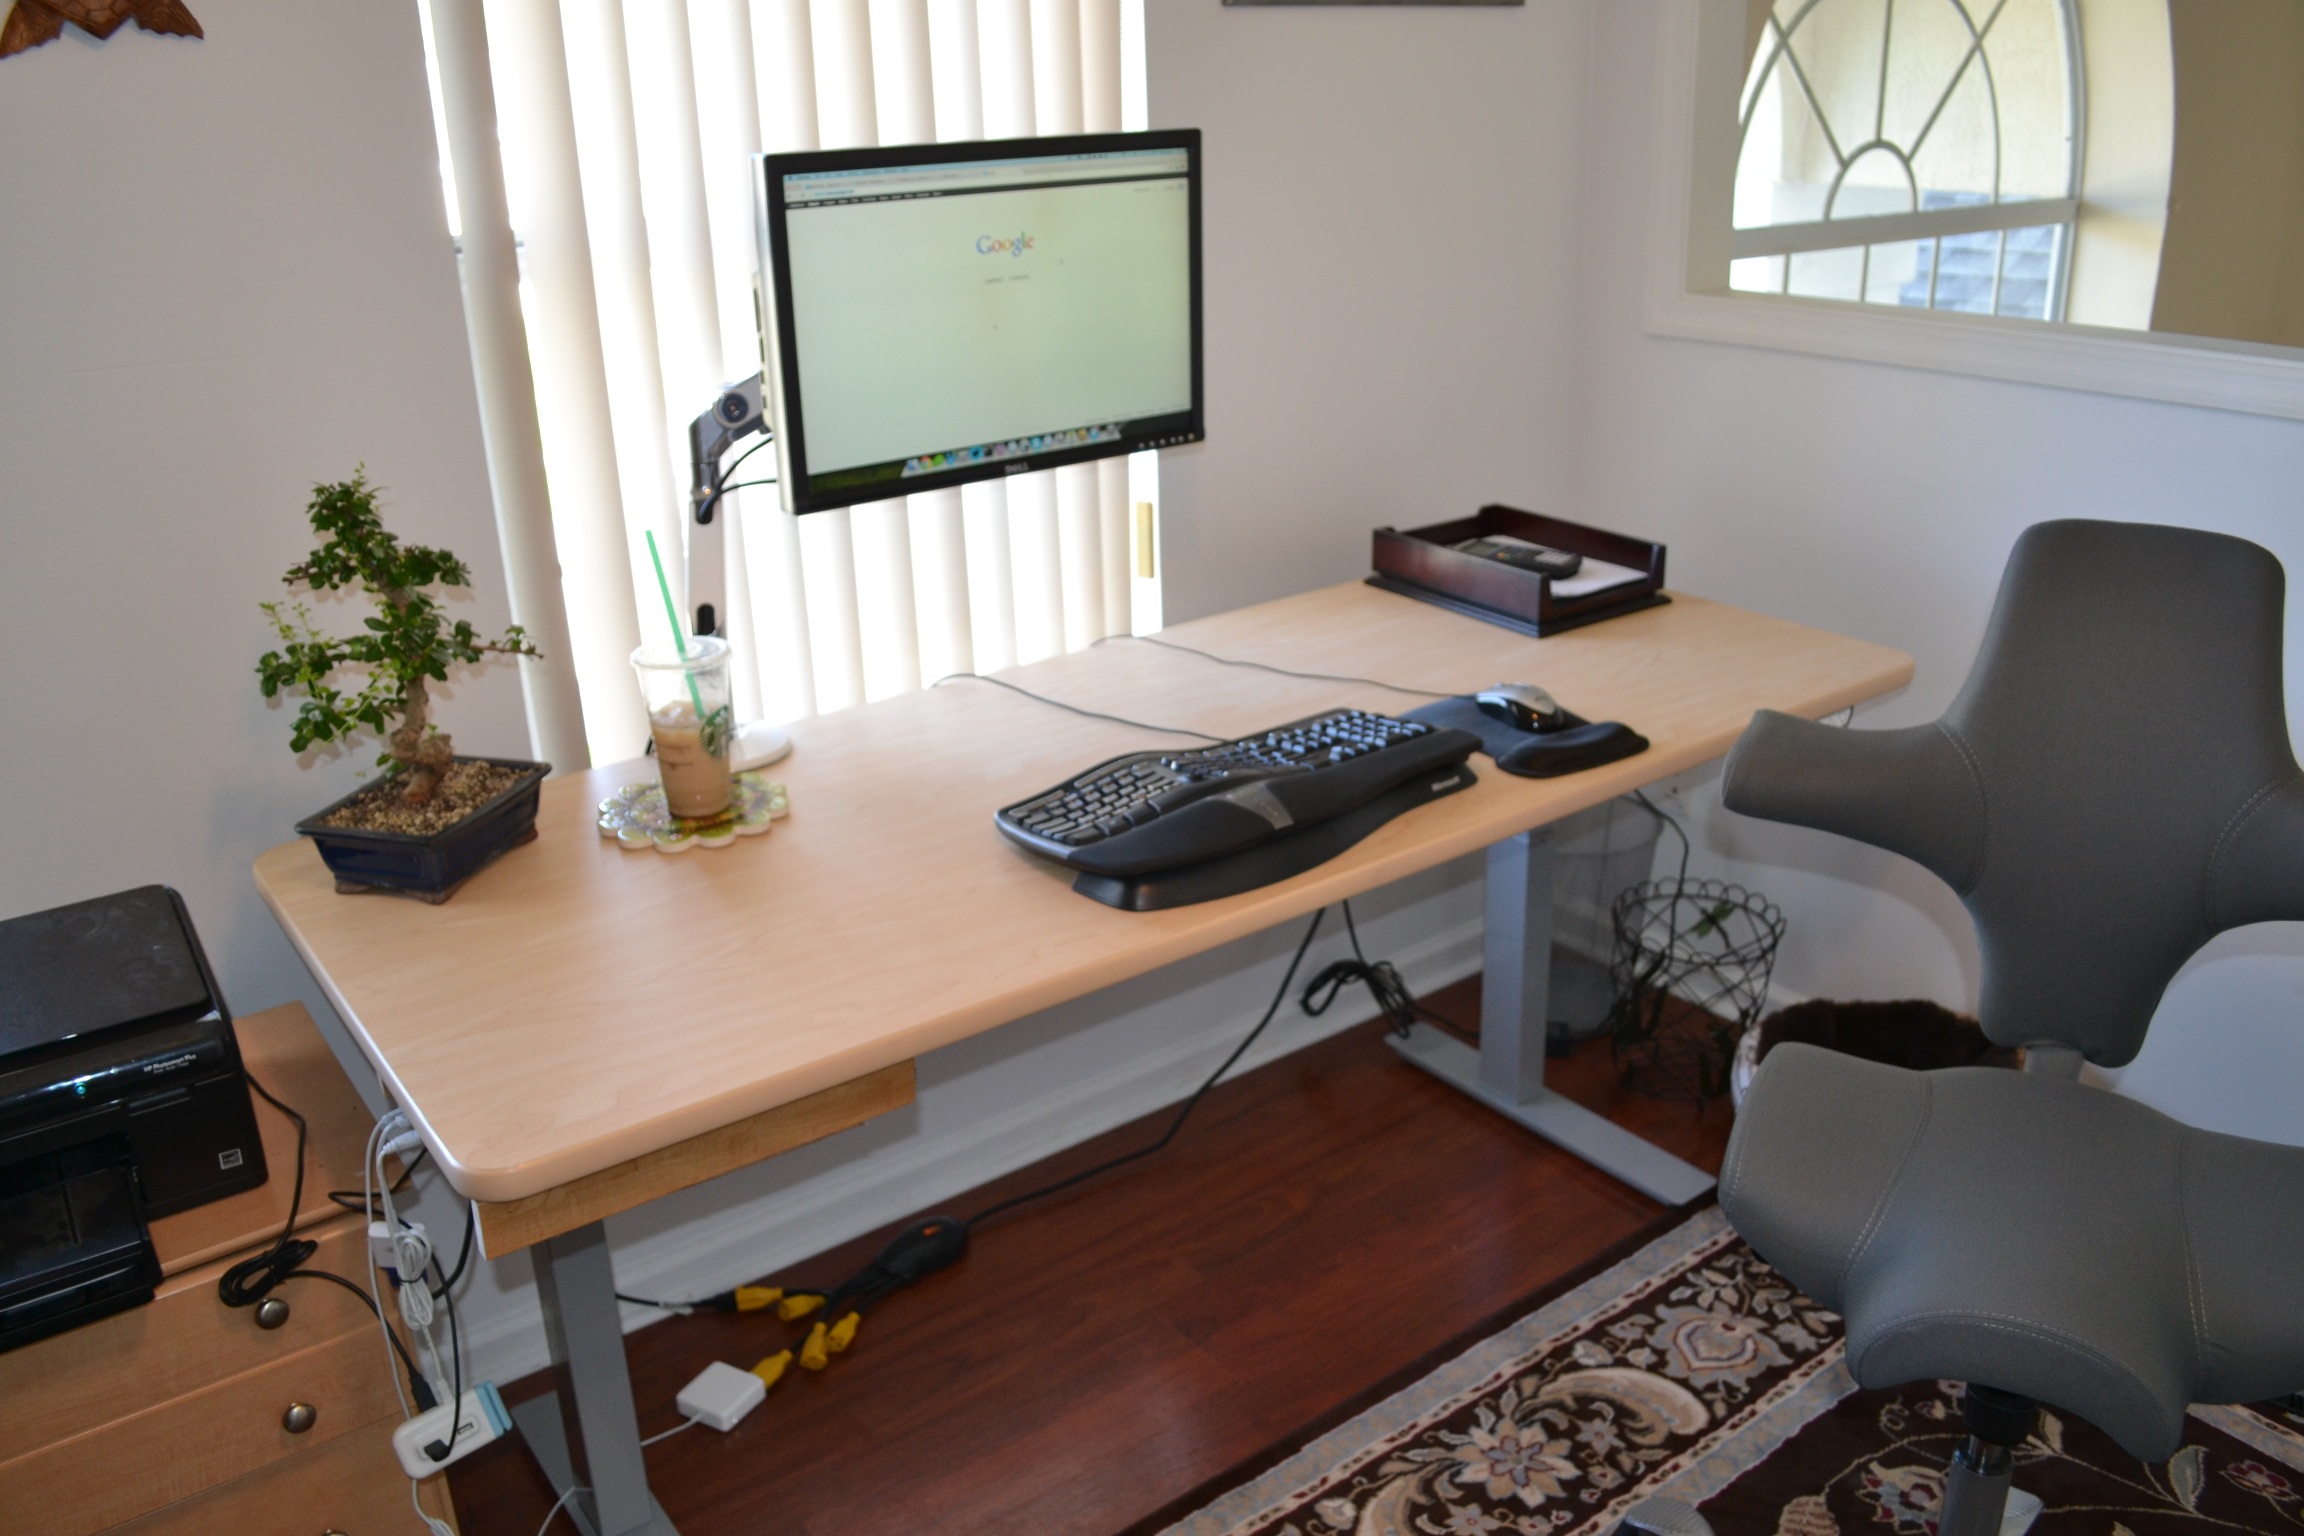
Rather than use a monitor stand like I’ve done in the past Jeff recommend purchasing a monitor arm so that I could quickly adjust the position as necessary without the constraints that a small monitor stand imposes. We went with a M8 Monitor Arm from HumanScale [3]:

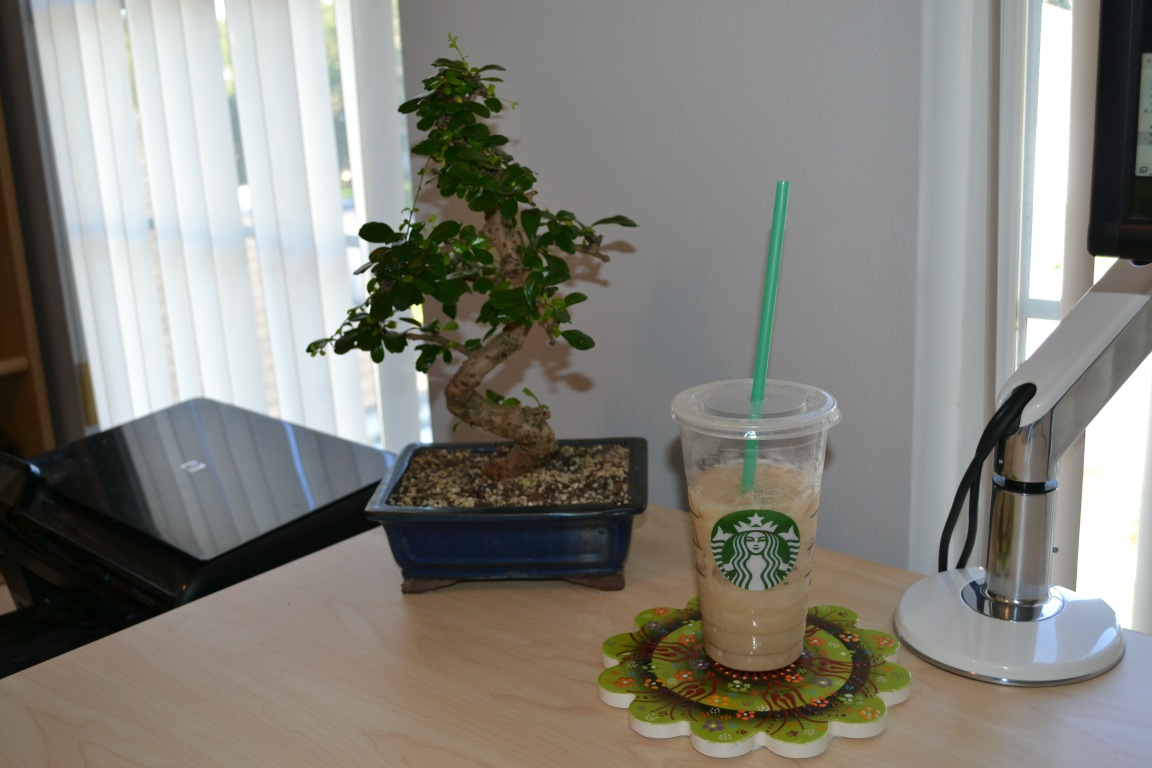
Finishing Touches
I kept my monitor, ergonomic keyboard and my mouse because I didn’t have any issues with them.

I also bought a Bonsai tree which I think adds a nice dash of color to the office. I also stole one of my wife’s hot plates so I can set dishes and drinks down without messing up the surface of the desk:
Initial Impressions
The total cost with shipping came out to be slightly over $2,000. Because the final price was over Automattic’s allowance, I did have to pay a small amount out of pocket but that was fine by me. I considered going with one of the cheaper versions of the chair, desk, or monitor arm but given how important it is to my productivity and happiness that I am comfortable while working, it was easily worth the small extra expense.
I’ve been using this new setup for about two weeks and so far I absolutely love it. I typically stand for about half of the day: either two hours standing/two hours sitting or half the day standing/half sitting (I’ll write a follow-up blog post in a few months once I’ve been using it longer to share what I’ve learned).
My back and neck pain are a fraction of what they used to be and contrary to what I would have thought I find that I have a lot more energy throughout the day.
Most importantly, I’ve found that without my normal discomfort I look for excuses to work instead of for excuses not to work which is exactly how a job should be.
Knowing what I know now, I wish I had purchased better furniture a long time ago. However, without Jeff’s help and Automattic’s contribution, I wouldn’t have known what to buy and I would have been hesitant to spend so much money on something that might or might not help. Props to Automattic for realizing how important this is and making it easy for its employees to take advantage of it.
If you have back, neck, or wrist pain and are on the fence about whether or not to buy a standing desk, I encourage you to take the leap. Even if you don’t get an expensive one you can Google around and find some cheap ones or even build one yourself. If you could use professional opinion, I’m sure Jeff would be happy to help as well. You can email him at jmeltzer [at] appliedergonomics.com.
Finally, if you have any recommendations on how to improve this setup based on your own experience, please feel free to leave a comment below or drop me a note at matthew.h.mazur [at] gmail.com. Thanks!
###
Notes:
[1] The actual line item was: “Capisco saddle seat with back in Grade 1 (Insight Stately) with carpet casters and a tall lift.”
[2] There were two line items for the desk, one for the work surface and one for the adjustable base: “RISE Height Adjustable Worksurface – Rectangular worksurface (30″D x 72″W), 1″ High Pressure Wilsonart® Standard Laminate surface MAPLE PVC T-Mold edges” and “RISE Height Adjustable Base Electric E6P 2-parallel base (two electric motors) with low voltage DC motors, Programmable switch, 22″- 48″ Height Range, 26″ Travel Range, 1.5″/second Travel Speed, 300 lbs. maximum distributed topload capacity, Silver Finish”. The Maple edge for the work surface wound up being discontinued so we went with Latte instead.
[3] The line item was: “M8 Monitor Arm with two-piece clamp mount with base, in polished aluminum with white trim, fixed angled link/ dynamic link, and standard VESA plate.”